


A good decoration and gift idea is DIY clay bead bracelets. Not only are they simple to create, but they also make charming gifts for loved ones. But how do you make clay bead bracelets? What are some creative clay bead ideas? If these questions linger in your mind, fear not. In this blog, we’ll dive straight into the intricacies of crafting your clay bead bracelet. In addition, we’ll explore some personalized cute clay bead bracelet ideas to elevate your style as well as brighten the day of your loved ones. Dive in now!
Before delving into the creative process of crafting clay bead bracelets, it's crucial to gather all the necessary supplies. Here's a comprehensive list to ensure your crafting experience flows smoothly:
String or Elastic Cord: Choose a durable string or elastic cord to thread your beads and create your bracelet.
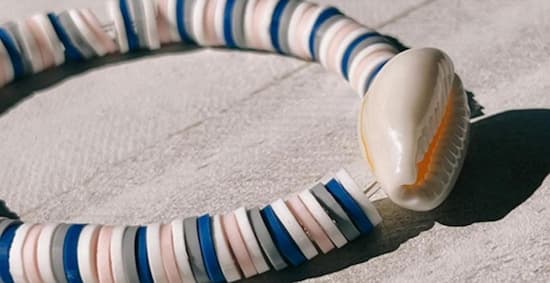
Clay Beads: Choose a variety of colors, shapes, and sizes to bring your bracelet design to life. Polymer clay beads are versatile and easy to work with, allowing you to unleash your creativity.
Bead Stopper: This handy tool prevents beads from sliding off the string or cord while you're working on your bracelet, keeping your design intact and frustration-free.
Beading Needle: A thin, flexible beading needle is essential for threading beads onto your string or cord with ease, especially when working with smaller beads or multiple strands.
Beading Tray: A beading tray provides a designated area to lay out your beads, tools, and supplies, ensuring everything stays within reach and neatly arranged.
Jewelry Glue: Sometimes, a little extra adhesive is needed to secure knots or embellishments on your bracelet. Choose a jewelry-specific glue that dries clear and bonds well with various materials.
Crimp Bead Covers: These small metal covers add a polished finishing touch to your bracelet design by concealing crimp beads or knots.
Scissors: Used to trim the excess cord.
Now that you've gathered your essential supplies, it's time to dive into the creative process of crafting your clay bead bracelet. Follow these simple steps to bring your vision to life:
Start by measuring your wrist size with a measuring tape. Then, cut the string to the length of your wrist size plus at least 8 inches using scissors. This extra room allows you to tie the knot with ease after stringing the beads.
A handy tip is that when cutting the string to the required length, it is better to cut conservatively (that is, cut out longer strings) so that you can trim away the excess length easily in case the string is too long.
If you're using an elastic cord, it's helpful to pre-stretch it slightly before stringing the beads. This process helps prevent the bracelet from becoming too loose over time. Simply hold one end of the cord firmly and gently pull the opposite end several times to stretch it slightly.
Now comes the central part of our DIY journey - stringing the beads onto the cord.
Stringing beads onto the cord is an intricate task that requires meticulous attention. Particularly, you wouldn’t want the beads already strung to fall off the cord. For this purpose, we use bead stoppers. Place the bead stopper at the end of the string, and you can start stringing beads.
Start by laying out the beads in a beading tray, and string them on one by one. Typically, the clay beads should be large enough to allow for manual stringing. But if there are beads whose holes are too small, the beading needle we prepared comes in handy.
As you reach the end of your string, try wrapping the bracelet around your wrist to test its comfortableness. Ideally, your bracelet should be snug and moderately tight on your wrist.
If you are satisfied with the test result, it is time to tie the knot. Remove the bead stopper and tie a triple square knot. Afterward, apply the jewelry glue to the knot to strengthen it. This can prevent the knot from accidentally untying. Once the glue goes dry, trim away the excess cord on the knot.
The last step is to hide the ungainly sight of the knot. Typically, there are two approaches for this purpose: either hide the knot inside neighboring beads or use a crimp cover.
The direct approach is to hide the knot inside the neighboring beads. To do this, simply slide the adjacent beads over the knot, and trim the excess cord. Remember to apply glue to the knot first before sliding the adjacent beads.
But if this approach turns out ineffective, there is an alternative way to salvage the style of the bracelet: using a crimp cover. To do this, apply glue to the knot, and close a crimp cover around the knot. After the glue has dried, trim away the excess cord. This approach neatly hides the knot from view and thereby makes the bracelet finally look perfect.
Now that you've mastered crafting clay bead bracelets, it is time to let your creativity shine with personalized clay bead bracelet inspo. Here are some personalizing bracelet ideas clay beads you can try out:
Custom Color Combinations: Mix and match colors that resonate with you, such as your favorite hues or those that complement your wardrobe.
Incorporate Textures and Patterns: Experiment with imprinting textures or creating clay bead bracelet patterns using stamps or household items.
Personalized Charms and Embellishments: Add charms or embellishments that hold special meaning, such as initials, symbols, or shapes that represent your interests.
Integrate Natural Elements: Include natural materials like gemstone beads, wooden beads, or freshwater pearls to infuse your bracelets with earthy vibes.
Apart from the above bracelet ideas with clay beads, you can also unleash your creativity and elevate your clay bead bracelet designs with these aesthetic clay bead bracelet ideas:
Draw inspiration from the natural world by incorporating organic shapes and earthy colors into your bracelet designs. Consider crafting clay beads in the likeness of leaves, flowers, or stones, and complement them with rustic wooden beads or gemstone accents for an elegant and nature-inspired look.
Create sleek and sophisticated clay bead bracelets using a refined color palette, clean lines, and simple geometric shapes. Opt for understated accents such as metallic beads or delicate charms to add a touch of elegance to your minimalist creations, perfect for everyday wear or layering with other accessories.
Let your imagination take flight with whimsical and fantastical designs that transport you to enchanted realms and magical landscapes. Experiment with whimsical shapes, playful colors, and imaginative motifs such as fairies, unicorns, or celestial symbols to create whimsical clay bead bracelets that evoke a sense of wonder and enchantment.

Crafting clay bead bracelets offers a canvas for self-expression and creativity. By following our step-by-step guide and infusing our cool clay bead bracelet ideas, you not only adorn your wrist but also carry stories and sentiments with you. In this way, each bracelet becomes more than just an accessory - it becomes a reflection of your individuality, passions, and experiences. So do not hesitate; invest in the Gionlion Clay Beads Bracelet Making Kit and more, and let your imagination soar today!
The number of clay beads needed for a bracelet depends on various factors such as the desired bracelet length, bead size, and spacing preferences. Typically, a regular clay bead bracelet requires 100-140 clay beads.
Yes. A bracelet made of clay beads can be incredibly worth it for several reasons:
Crafting your own clay bead bracelet allows for personalization and creativity.
Clay beads are lightweight, comfortable to wear, and versatile, suitable for various occasions.
Creating clay bead bracelets can be a therapeutic and enjoyable hobby, offering a sense of accomplishment with each handmade piece.
Lastly, they make thoughtful and heartfelt gifts, appreciated for their handmade charm.
Yes. Most clay beads are made from waterproof materials like PVC, lending clay bead bracelets some resistance to water. However, prolonged or excessive moisture can still damage clay bead bracelets. To maintain their integrity, it's advisable to remove clay bead bracelets before swimming, showering, or engaging in water-related activities.