


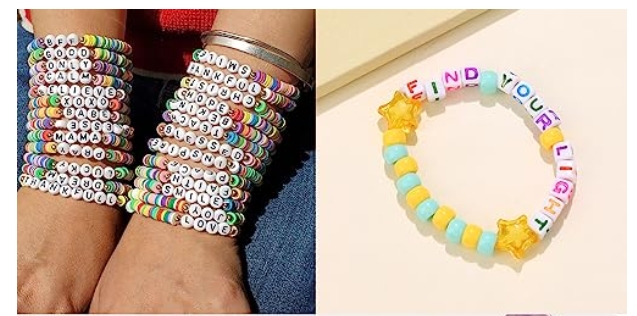
Kandi bracelets are the ultimate symbol of rave culture's PLUR (Peace, Love, Unity, Respect) philosophy. These colorful, beaded bracelets are more than just fashion accessories; they are a means of expression and connection among those immersed in the music festival and dance event scenes. In this comprehensive guide, you'll learn not only the history and cultural significance of Kandi bracelets but also how to create your own custom designs. Join us as we explore this joyful, artistic tradition.

Kandi bracelets have their origins in the early 1990s rave scene, where music enthusiasts exchanged colorful beaded jewelry during all-night dance parties. The term "Kandi" playfully references the vibrant, candy-like appearance of these bracelets. Crafted from colorful plastic beads, Kandi makers formed intricate patterns and messages. The tradition of creating and sharing Kandi became integral to rave and festival communities.
These bracelets are closely tied to PLUR (Peace, Love, Unity, Respect) culture, serving as tangible reminders of unity and respect, fostering connections among festival-goers regardless of background. At the core of PLUR culture is the idea of celebrating music and life together, transcending differences. Kandi bracelets act as a unifying force, facilitating connections and lasting friendships in the festival community.
Before learning how to make a cuff bracelet kandi, here's a list to help you get started:
Now you are ready to learn how to make a kandi cuff bracelet. To begin, follow these instructions on how to make kandi bracelets for beginners:
Step 1: Gather Materials
Collect all your materials in one place. Choose a color scheme and select beads accordingly. To make a kandi cuff with letters, consider getting letter beads as well. Study the length of the bracelet you want to make.
Step 2: Measure and Cut Cord
Using a tape measure or ruler, determine the desired length for your bracelet. Cut the stretch cord or elastic string to this length, adding a few extra inches for knotting. If you plan to make a double kandi bracelet, cut two strands of stretch cord or elastic string to this length, adding a few extra inches for knotting.
Step 3: Begin Stringing Beads
Thread one end of the cord through a single bead to create a stopper. This will prevent the other beads from sliding off as you work. Begin stringing your chosen beads onto the cord in your desired pattern or color sequence.
Step 4: Finish the Pattern
Continue stringing beads until you reach the desired length, periodically checking against your wrist to ensure a proper fit.
Step 5: Tie Off the Ends
Once you've reached the desired length, remove the stopper bead and tie a secure knot with the two ends of the cord. Consider using a double knot for added security.
Step 6: Optional Clasp or Fastener
If you prefer, add a clasp or fastener to make it easier to take the bracelet on and off. Attach it securely to the ends of the cord.
Step 7: Trim Excess Cord
Trim any excess cord with scissors, leaving a small tail to ensure the knot stays secure.
Now that you've mastered the steps to craft your own Kandi bracelet, you might appreciate the convenience and unique design of pre-made options. Consider the "MIIIM kandi bracelets" a surprise set that offers an array of spicy spoon friendship bracelets adorned with quirky rave phrases. These handmade pony bead bracelets are crafted from quality materials to endure late-night festivities, adding a functional yet fashionable flair to your festival experience.
Over time, Kandi bracelets may accumulate dirt or lose their luster. Follow the tips below to clean them:
Knowing how to make a kandi bracelet and crafting it is not just about creating beautiful accessories; it's about embracing a culture of love, unity, and creativity. Let this guide be your inspiration as learning how to make a simple kandi bracelet. Enjoy your journey of crafting this stunning masterpiece and spreading positive vibes in the world of festivals and raves.
The ideal length varies, but a standard size is around 7 inches. Measure your wrist and adjust the length accordingly, keeping in mind the stretchiness of the cord.
Choose high-quality materials, secure your clasps tightly, and handle your bracelet with care. Avoid excessive pulling or stretching to ensure longevity.
While Kandi bracelets are generally resilient, prolonged exposure to water may affect their durability. It's advisable to remove them before swimming or showering to preserve their vibrant colors and structural integrity.
Wondering how to make a kabbalah bracelet? Learn step-by-step techniques with our comprehensive guide for crafting unique spiritual accessories.
Read More
Discover the art of how to make a hair tie bracelet with our step-by-step guide. Learn how to make stylish accessories effortlessly at home.
Read More
Get the gist of how to make pony bead bracelets in a few simple steps. Learn the essential bead bracelet making steps & effective maintenance tips with us.
Read More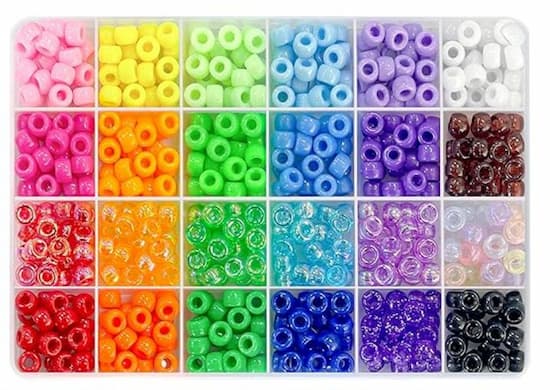
Check out our cute pony bead bracelet ideas & infuse your DIY craft with personal flair. Let your creativity flow by crafting simple pony bead bracelets.
Read More