


Have you ever been amazed by the stylish flower bead bracelet on your friend’s wrist? If so, you must have also wondered how such a cute craft is made. So how to make flower bead bracelets? Is it hard and time-consuming to make one at home? Fortunately, crafting your own flower bead bracelet is nowhere near difficult. Within a few steps, you can learn the basics of how to make a flower beaded bracelet and craft your first-ever flower bead bracelet. Without further ado, let’s explore the realm of crafting your own flower bead bracelet now!

A successful journey of how to make a beaded flower bracelet begins with gathering the essential materials. Typically, the items you’ll need include:
Beads: The heart of your bracelet, beads come in various shapes, sizes, and colors. For our current project, we choose orange, yellow, and white seed beads.
Beading Wire: This flexible wire serves as the foundation for stringing your beads. Select a wire that is sturdy yet pliable, such as nylon-coated stainless steel or tiger tail wire.
Crimp Beads: Crimp beads are tiny metal beads used to secure the ends of your beading wire, preventing the beads from sliding off.
Jump Rings: These small, circular metal rings are essential for closing the bracelet.
Lobster Claw Closure: Crucial for the final closure process.
Scissors: A sharp pair of scissors is indispensable for cutting your beading wire to the desired length and trimming any excess wire or thread.
Jewelry Pliers: Jewelry pliers are versatile tools that assist in various aspects of jewelry making, including bending wire, opening and closing jump rings, and securing crimp beads.
Jewelry Glue (Optional): While not always necessary, jewelry glue can be useful for securing knots.
You must be having a hard time containing your bubbling zest once you’ve gathered the essential supplies. Worry not, the real journey of how to make a flower bracelet with beads is about to begin.
Our daisy bead bracelet tutorial is divided into 4 stages. We’ll present them one by one.
The only hard part and all the technical bits of a DIY flower bead bracelet lie in making the first flower. Once you’ve mastered how to make a flower, you’re set to breeze through the remaining process of how to make a daisy bead bracelet in a flash.
Once you’ve mastered the gist of making a single flower pattern, all that remains to be done is to repeat the flower-making process along the whole length of the string, with orange-colored base beads filling the intervals between adjacent flowers. This might be a tedious task but should not consume much of your brain power.
Finally, we’ve beaded our way to the open end of the beading string. The whole daisy chain is basically finished at this point, and the sole remaining task is to attach closure.
To perfect your skills of how to make beaded daisy bracelets, we’ve curated some tested tips. Try them out if you want the best result from DIY flower bead bracelets:
Choose High-Quality Beads With Larger Holes: Opt for beads that are well-crafted, uniform in size, and vibrant in color. Preferably, the beads should also have larger holes so that you can have an easier time threading.
Add Personal Touches: Infuse your bracelet with personal touches by incorporating meaningful charms, birthstones, or beads that hold sentimental value. These subtle additions can transform your bracelet into a cherished keepsake or a thoughtful gift for someone special.
Apply Glue for Added Security: Consider applying a small amount of jewelry glue to the knots before closing the crimp beads for added security, especially if your bracelet will be subject to frequent wear or movement.
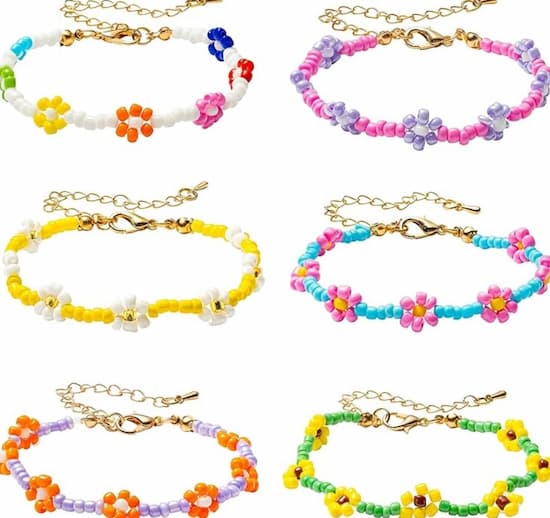
By now, you should have a clear idea of how to make flower bead bracelets that suit your aesthetic sense and personality. Indeed, the process of how to make a flower bracelet with seed beads is not as technical as you might think. By gathering your supplies, following our flower beaded bracelet tutorial and possibly adding a bit of personal flair, you are just moments away from your fruit of endeavor - a flower bead bracelet as beautiful as the PANTIDE Colorful Daisy Flower Bead Bracelet but blessed with your own style.
For making flower bead bracelets, nylon-coated stainless steel wire or multi-strand beading wire are excellent choices as they offer strength, flexibility, and resistance to stretching. Additionally, they come in various thicknesses to accommodate different bead sizes and designs.
Choosing the right bead size for your bracelet depends on factors such as design, style, and personal preference.
For a delicate and intricate look, opt for smaller beads, such as seed beads or 4mm rounds. On the other hand, larger beads, like 8mm rounds or gemstones, create a bold and statement-worthy piece.
Yes, you can adjust the length of your flower bead bracelet to ensure a comfortable fit. For example, to make smaller bracelets, simply trim off more cords before closure. Conversely, you can cut off a longer string in the beginning, or attach additional jump rings before finishing with a closure to lengthen your bracelet.
Learn how to make beaded bracelets and embark on your DIY bracelet adventure. Arm yourself with the detailed steps & an array of design ideas and techniques.
Read More
Learn our curated cute bead bracelet ideas & craft your personalized bracelet masterpiece. We also cover detailed guidance for making your own bracelets.
Read More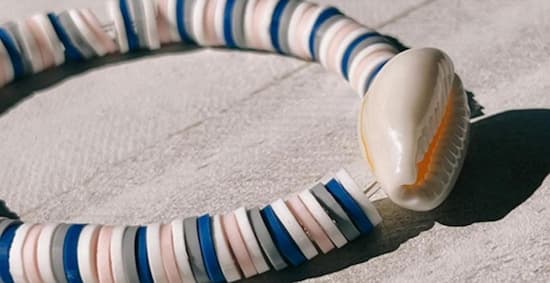
Check out our flat clay bead bracelet ideas & DIY bead bracelets at home. Decorate your wrist & express your sentiments with our ideas for clay bead bracelets.
Read More