


Crafting friendship bracelets is more than just a hobby; it's a timeless expression of connection and creativity. Whether you're a seasoned crafter or a beginner, diving into the world of beaded friendship bracelets opens up a realm of possibilities. But how to make friendship bracelets with beads? How to put beads in a friendship bracelet?
In this comprehensive guide, we'll explore everything you need to know related to how to make beaded friendship bracelets. From choosing the right materials to mastering essential techniques, we’ve got you covered. Get ready to embark on a journey of friendship and self-expression through our friendship bracelet with beads instructions now!

So how do you make friendship bracelets with beads? By gathering materials first. Here's a breakdown of what you'll need in your journey of DIY friendship bracelet with beads:
Beads: The heart of any beaded bracelet, selecting the right beads is crucial. Choose beads in various colors, sizes, and materials to suit your design preferences.
Thread or Cord: Strong and durable thread or cord is essential for holding your beads together. Nylon, cotton, and hemp are popular choices.
Scissors: A good pair of scissors is indispensable for cutting your thread or cord cleanly and precisely.
Crimp Covers (Optional): A powerful tool to hide the knot and ensure a professional finish.
Jewelry Glue: Jewelry glue is essential for securing the knot after tying it up.
Creating homemade beaded friendship bracelets is a delightful blend of creativity and craftsmanship. Follow our friendship bracelet with beads tutorial to craft your own personalized masterpiece.
The first step of how to make easy friendship bracelets with beads is design planning. Begin by envisioning the design of your homemade beaded friendship bracelet. Consider the color scheme, pattern, and bead arrangement. Sketching your design or laying out the beads beforehand can help visualize the final product. If you do not know how to start, learning about friendship bracelet patterns ahead will help with that.
Determine the desired length of your bracelet, keeping in mind wrist size and any additional length needed for tying knots or attaching clasps. Use scissors to cut the thread or cord to the appropriate length, adding a few extra inches for adjustments.
With the cord cut out, it is time to string the beads onto it. How to add beads to a friendship bracelet? According to your design. Take your time to thread each bead carefully, maintaining the desired pattern and spacing between beads.
Once you are done with stringing the beads, hold both ends of the string together and tie a tight knot. Particularly, if you are using an elastic cord, pre-stretch the cord before tying. This knot will secure all the beads in place and prevent them from slipping off the string. You can double or triple knot the string for added security, especially if you're using a smooth thread or cord that might be prone to slipping.
To reinforce the knots and ensure longevity, consider applying a small amount of jewelry glue to the knots. This extra step adds an additional layer of security, especially if the bracelet will be worn frequently.
After tying a secure knot to hold the beads in place, you'll want to conceal it for a polished finish. Here are two popular methods to hide the knot:
Slide the Knot Under a Bead: Carefully slide the knot under a nearby bead, ensuring it sits snugly inside the hole of the bead. This method effectively hides the knot within the design of the bracelet, maintaining a seamless appearance.
Use a Crimp Cover: Another option is to use a crimp cover to disguise the knot. A crimp cover is a small metal finding that encases the knot, providing a clean and professional look. Simply place the crimp cover over the knot and use flat-nose pliers to gently close it, securing the knot inside.
With the knot concealed and secured, it's time to add the finishing touch to your beaded friendship bracelet. Trim away the excess cord close to the knot using scissors. Afterward, take a moment to inspect the bracelet for any loose beads or imperfections. If all is good, you are done!
Mastering the art of bracelet-making requires practice, patience, and attention to detail. Here are some valuable tips to help you perfect your technique and create stunning bracelets:
Secure With Jewelry Glue: while some may find applying the glue after tying the knot unnecessary, this is not the case. The glue does a perfect job of preventing the knot from coming undone.
Mix Beads of Different Sizes: Mixing beads of different sizes is the most effective way to add dimensions to your handmade friendship bracelet.
Put Spacers Between Words: When using letter beads to spell out words or messages on your bracelet, consider adding spacers between each word. This ensures that your friends can read your message at a single glance, increasing its impact.

Friendship is a bond that needs to be constantly reinforced, and the best way to do this is through exchanging tokens like friendship bracelets. By DIYing your own friendship bracelet, you are telling your friends that you value their company and hope to keep your mutual commitment alive in the future.
Fortunately, making a friendship bracelet with beads is no difficult task, as evidenced by our guide on how to make friendship bracelets with beads. All you need is adherence to the steps outlined above and a tiny sprinkle of creativity. So, don’t wait any longer; invest in the required materials or a QUEFE Friendship Bracelet Kit, and happy crafting easy beaded friendship bracelets today!
For most friendship bracelet projects, a standard size of 0.5mm to 1mm thickness is suitable. Thinner strings, like nylon or polyester threads, are ideal for delicate beadwork and intricate patterns. Thicker cords, such as cotton or hemp, provide more strength and stability.
For a friendship bracelet with beads, the number of strands needed depends on the desired thickness and complexity of the design. Typically, a single strand of sturdy thread or cord is sufficient for basic beadwork. However, for more intricate patterns or heavier beads, multiple strands may be required to provide stability and support.
The chevron pattern stands out as one of the most popular friendship bracelet patterns. Its timeless appeal lies in its simplicity and versatility. Chevron bracelets feature diagonal stripes that form a zigzag or V-shaped design, creating an eye-catching geometric pattern.

Discover how to make flower bead bracelets to craft your personal masterpiece. Make a compelling statement for your inner self with our expert crafting tips.
Read More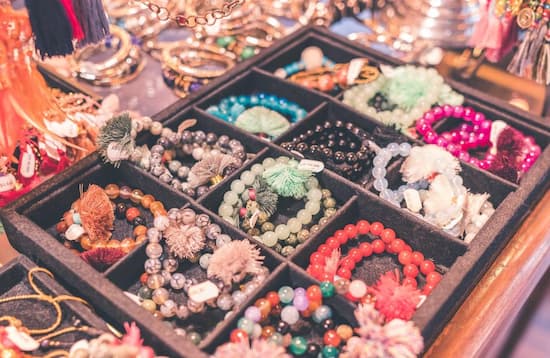
Learn how to make beaded bracelets and embark on your DIY bracelet adventure. Arm yourself with the detailed steps & an array of design ideas and techniques.
Read More
Learn our curated cute bead bracelet ideas & craft your personalized bracelet masterpiece. We also cover detailed guidance for making your own bracelets.
Read More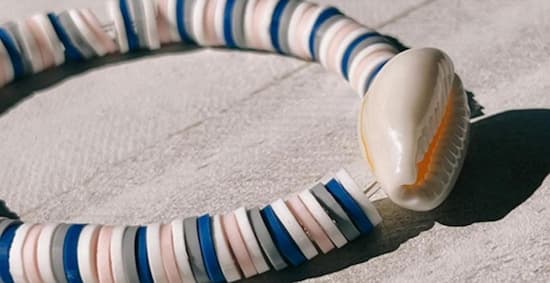
Check out our flat clay bead bracelet ideas & DIY bead bracelets at home. Decorate your wrist & express your sentiments with our ideas for clay bead bracelets.
Read More