


Seed beads have become coveted adornments, effortlessly enhancing one's style. Their simplicity in crafting renders them a favorite among DIY enthusiasts. Yet, the question lingers: How does one embark on crafting an inaugural seed bead bracelet at home? In this guide, we’ll introduce the detailed steps of making your own seed bead bracelet to help you create your DIY masterpiece. We’ll also unravel a plethora of seed bead bracelet ideas to ignite your creative flair. Get started!

Before delving into the art of crafting your own seed bead bracelet, it's essential to gather the necessary materials. Here's a comprehensive list to get you started:
Seed Beads: The star of the show. Choose from a wide array of colors, sizes, and finishes to suit your design.
Beading Thread: Opt for a strong, durable thread such as nylon or polyester, suitable for weaving through tiny bead holes.
Needles: Thin beading needles are essential for threading seed beads onto your chosen thread.
Scissors: A sharp pair of scissors will be handy for cutting your thread cleanly.
Bead Mat or Tray: A bead mat or tray will prevent your beads from rolling away and help keep your workspace organized.
Measuring Tape or Ruler: Accurate measurements ensure your bracelet fits perfectly.
Jewelry Glue: A small amount of jewelry glue is needed to secure knots.
Embarking on your journey to create a stunning seed bead bracelet is an exciting endeavor. Follow this comprehensive step-by-step guide to bring your vision to life.
Before diving into the actual process of making your bead bracelet, you need to plan your seed bead bracelet designs. What color combinations and patterns would you like to have on your bracelet? Should you incorporate letter beads and convey a word message? Having clear answers to such questions is crucial for ensuring coherence and harmony in your design.
Creating a conducive workspace is essential for a smooth crafting experience. Choose a well-lit area with sufficient space to spread out your materials and tools. Lay down your bead mat or tray and place the beads in them to prevent them from rolling away.
Precision is key when it comes to sizing your bracelet. Begin by measuring the circumference of your wrist using a flexible tape measure or a piece of string, and add a few extra inches to the measured value to accommodate for knot tying. Then, carefully cut the beading thread using sharp scissors. It's advisable to cut a slightly longer length of thread than required to avoid running short during the stringing process.
With your design plan in mind and the thread cut to size, it's time to string the beads. Thread the seed beads onto the string in the sequence and arrangement determined by your design. Take your time to ensure each bead is threaded securely and aligned according to your vision.
Once all the beads are strung onto the thread, it is time to tie both ends of the thread together to form a closed loop. Particularly, if your beading cord is elastic, stretch it before tying it in order to ensure a snugger fit. This can ensure that the beads come together more tightly. After tying the knot, apply some jewelry glue to the knot for added security. (Check out blog here to know more on how to tie the knot of a bracelet).
After tying the knot, it's essential to conceal it for a polished finish. There are two common approaches for hiding the knot:
Slide Under an Adjacent Bead: This is a simple yet effective trick to make the knot disappear. Simply slide an adjacent bead over the knot until it is no longer visible. This method creates a seamless transition between the beads, giving the illusion of a continuous strand without any visible interruptions.
Use a Crimp Cover: Alternatively, you can use crimp covers to enclose the knot discreetly. Then, place the crimp cover over the knot, ensuring it sits snugly against the beads. Use flat-nose pliers to gently close the crimp cover, pressing the sides together to secure the knot within. This method provides a professional-looking finish and adds a decorative element to your bracelet.
With the knot concealed, the final step is to trim any excess thread close to the knot using sharp scissors. Once trimmed, inspect your bracelet for any imperfections, and congratulate yourself if there are none because your DIY seed bead bracelet is now complete!
For ambitious crafters who want to take their mastery of DIY seed bead bracelets to new heights, the following seed bead ideas for bracelets are bound to spark their interest.
Ever been carried away by the simplistic yet strikingly beautiful little flower patterns for seed bead bracelets? If so, try crafting your own daisy chain bracelet.
The daisy chain is among the easier seed bead bracelet patterns. By threading the string repeatedly through the beads in a specific fashion, you can create flower patterns with ease and create a whimsical and charming accessory that showcases your mastery of beadwork.
Dive deeper into the art of bead weaving by experimenting with intricate seed bead bracelet patterns and designs. Explore techniques such as peyote stitch, right angle weave, and herringbone stitch to create mesmerizing textures and shapes in your bracelets.
Elevate the finishing touches of your seed bead bracelets by mastering complex clasps and closures. Experiment with innovative closure designs such as toggle clasps, box clasps, and magnetic clasps to add both functionality and aesthetic appeal to your seed bead bracelets.
For a special touch that reflects your unique style and personality, here are some creative glass seed bead bracelet ideas to customize your seed bead bracelets.
Select beads that correspond to birth months, representing the birthstones of loved ones or significant dates in your life. Alternatively, add initial charms or alphabet beads to spell out names, initials, or meaningful words.
Infuse your seed bead bracelet with symbolism and meaning by integrating specific seed bead patterns for bracelets or motifs. Choose patterns that resonate with you personally, such as hearts for love, stars for guidance, or infinity symbols for eternal friendship.

Here you have it: a comprehensive guide on crafting your own simple seed bead bracelet, coupled with an array of practical and cute seed bead bracelet ideas to ignite your creativity. Armed with this detailed roadmap, you're bound to unleash your artistic flair and craft your personal masterpiece. Remember to experiment a lot if you want a result as aesthetic and charming as the KELITCH Seed Beads Strand Bracelet!
For beginners, it's best to start with size 11/0 seed beads due to their versatility and ease of use. These beads are widely available, making them ideal for practicing various beadwork techniques. Additionally, their size allows for detailed designs without being too small to handle.
To ensure your seed bead bracelet fits perfectly, follow these steps:
Measure Your Wrist: Use a flexible tape measure or a piece of string to measure the circumference of your wrist. Make sure to measure snugly but not too tight.
Add Extra Length: Add extra length to your measurement to accommodate the size of the beads, closures, and any desired drape. Adding about 0.5 to 1 inch to your wrist measurement is typically sufficient.
Test Fit: Before finishing your bracelet, test the fit by wrapping it around your wrist to ensure it's comfortable and sits as desired.
To hide the knot on a seed bead bracelet, there are two common techniques you can employ.
One method is to slide the knot underneath an adjacent bead, ensuring it sits snugly in the bead hole.
Alternatively, you can use crimp covers to enclose the knot. Place the crimp cover over the knot and gently close it with flat-nose pliers, ensuring the knot is securely hidden within.

Learn how to make friendship bracelets with beads with our easy & clear steps. Master the art of crafting your token of friendship in a few minutes.
Read More
Discover how to make flower bead bracelets to craft your personal masterpiece. Make a compelling statement for your inner self with our expert crafting tips.
Read More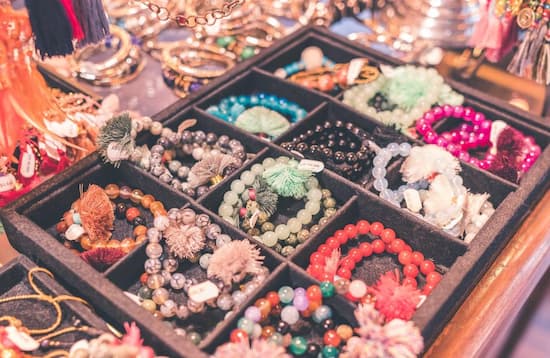
Learn how to make beaded bracelets and embark on your DIY bracelet adventure. Arm yourself with the detailed steps & an array of design ideas and techniques.
Read More
Learn our curated cute bead bracelet ideas & craft your personalized bracelet masterpiece. We also cover detailed guidance for making your own bracelets.
Read More